
How To Make Herbal Salve (Step-by-Step)
Everything You Need To Know To Make Your Own Herbal Body Salve At Home


One of the plants I’m most excited about right now? Calendula. After trying (and failing) to grow my own from seed, I found an amazing local organic farmer willing to let me pick some of hers. The freshly dried blooms are now infusing in oil in four quart-jars on my bedroom window-sill, and will be ready to strain in the coming weeks.
If you’ve ever been curious to make your own herbal salve, this week’s post is for you.
Making an herbal salve is the natural progression to making your own herbal body oils. The best part? You likely have plants you can infuse right in your own backyard.
Warning: This post is a looong. If you’re not ready to get into the nitty gritty of salve-making, peep these plants at the top and save the bottom “How to” for later!
Some of my favorite plants to infuse in oil:
Vulnerary plants (to make skin-healing oil)

Comfrey (Symphytum officinale)- While many an online article talks about the “toxicity” of this plant, the PAs (pyrrolizidine alkaloids) are unlikely to cause any real harm when used externally (gotta love the way modern medicine “tests” plant safety…by force feeding animals unnaturally large quantities of something then watching them get sick and claiming toxicity—a subject for another time).
Comfrey is known by many as “Knitbone” and was used historically for healing wounds and bones. Because of how quickly it goes to work, it’s not recommended for use on deep wounds where bacteria may get trapped inside. Instead, use this oil or salve on cuts, cracked hands, burns, or scars that are at least several weeks out.How to get it: As long as you don’t live somewhere too dry or hot, this plant is fairly easy to grow. Since you’ll want to infuse the dried herb, you can also purchase it online from reputable sources like Mountain Rose Herbs.
Photo by Chandan Chaurasia on Unsplash Calendula (Calendula officinalis or Calendula resina)- Calendula is another amazing healer and can be used topically on a wide variety of skin ailments from cuts and burns, healing rashes, scars, bug bites, and pretty much any kind of skin irritation. I once used it to help a girl who had a chemical burn/rash on her face after too much chlorine and sun exposure (she was a competitive swimmer).
How to get it: Grow your own from seed starts or find a local farmer willing to sell you some. This plant is best infused when freshly dried, meaning you will harvest and let it sit for a week or so before adding it to oil (this helps cut down on the risk of spoilage). You can also purchase some dried calendula flowers from online herb stores—but I prefer to get these locally whenever possible since I can be more sure of their quality. If they’re still sticky (resinous) to the touch, its probably good medicine.

Relaxing Nervine plants (for topical relief of nerve pain)
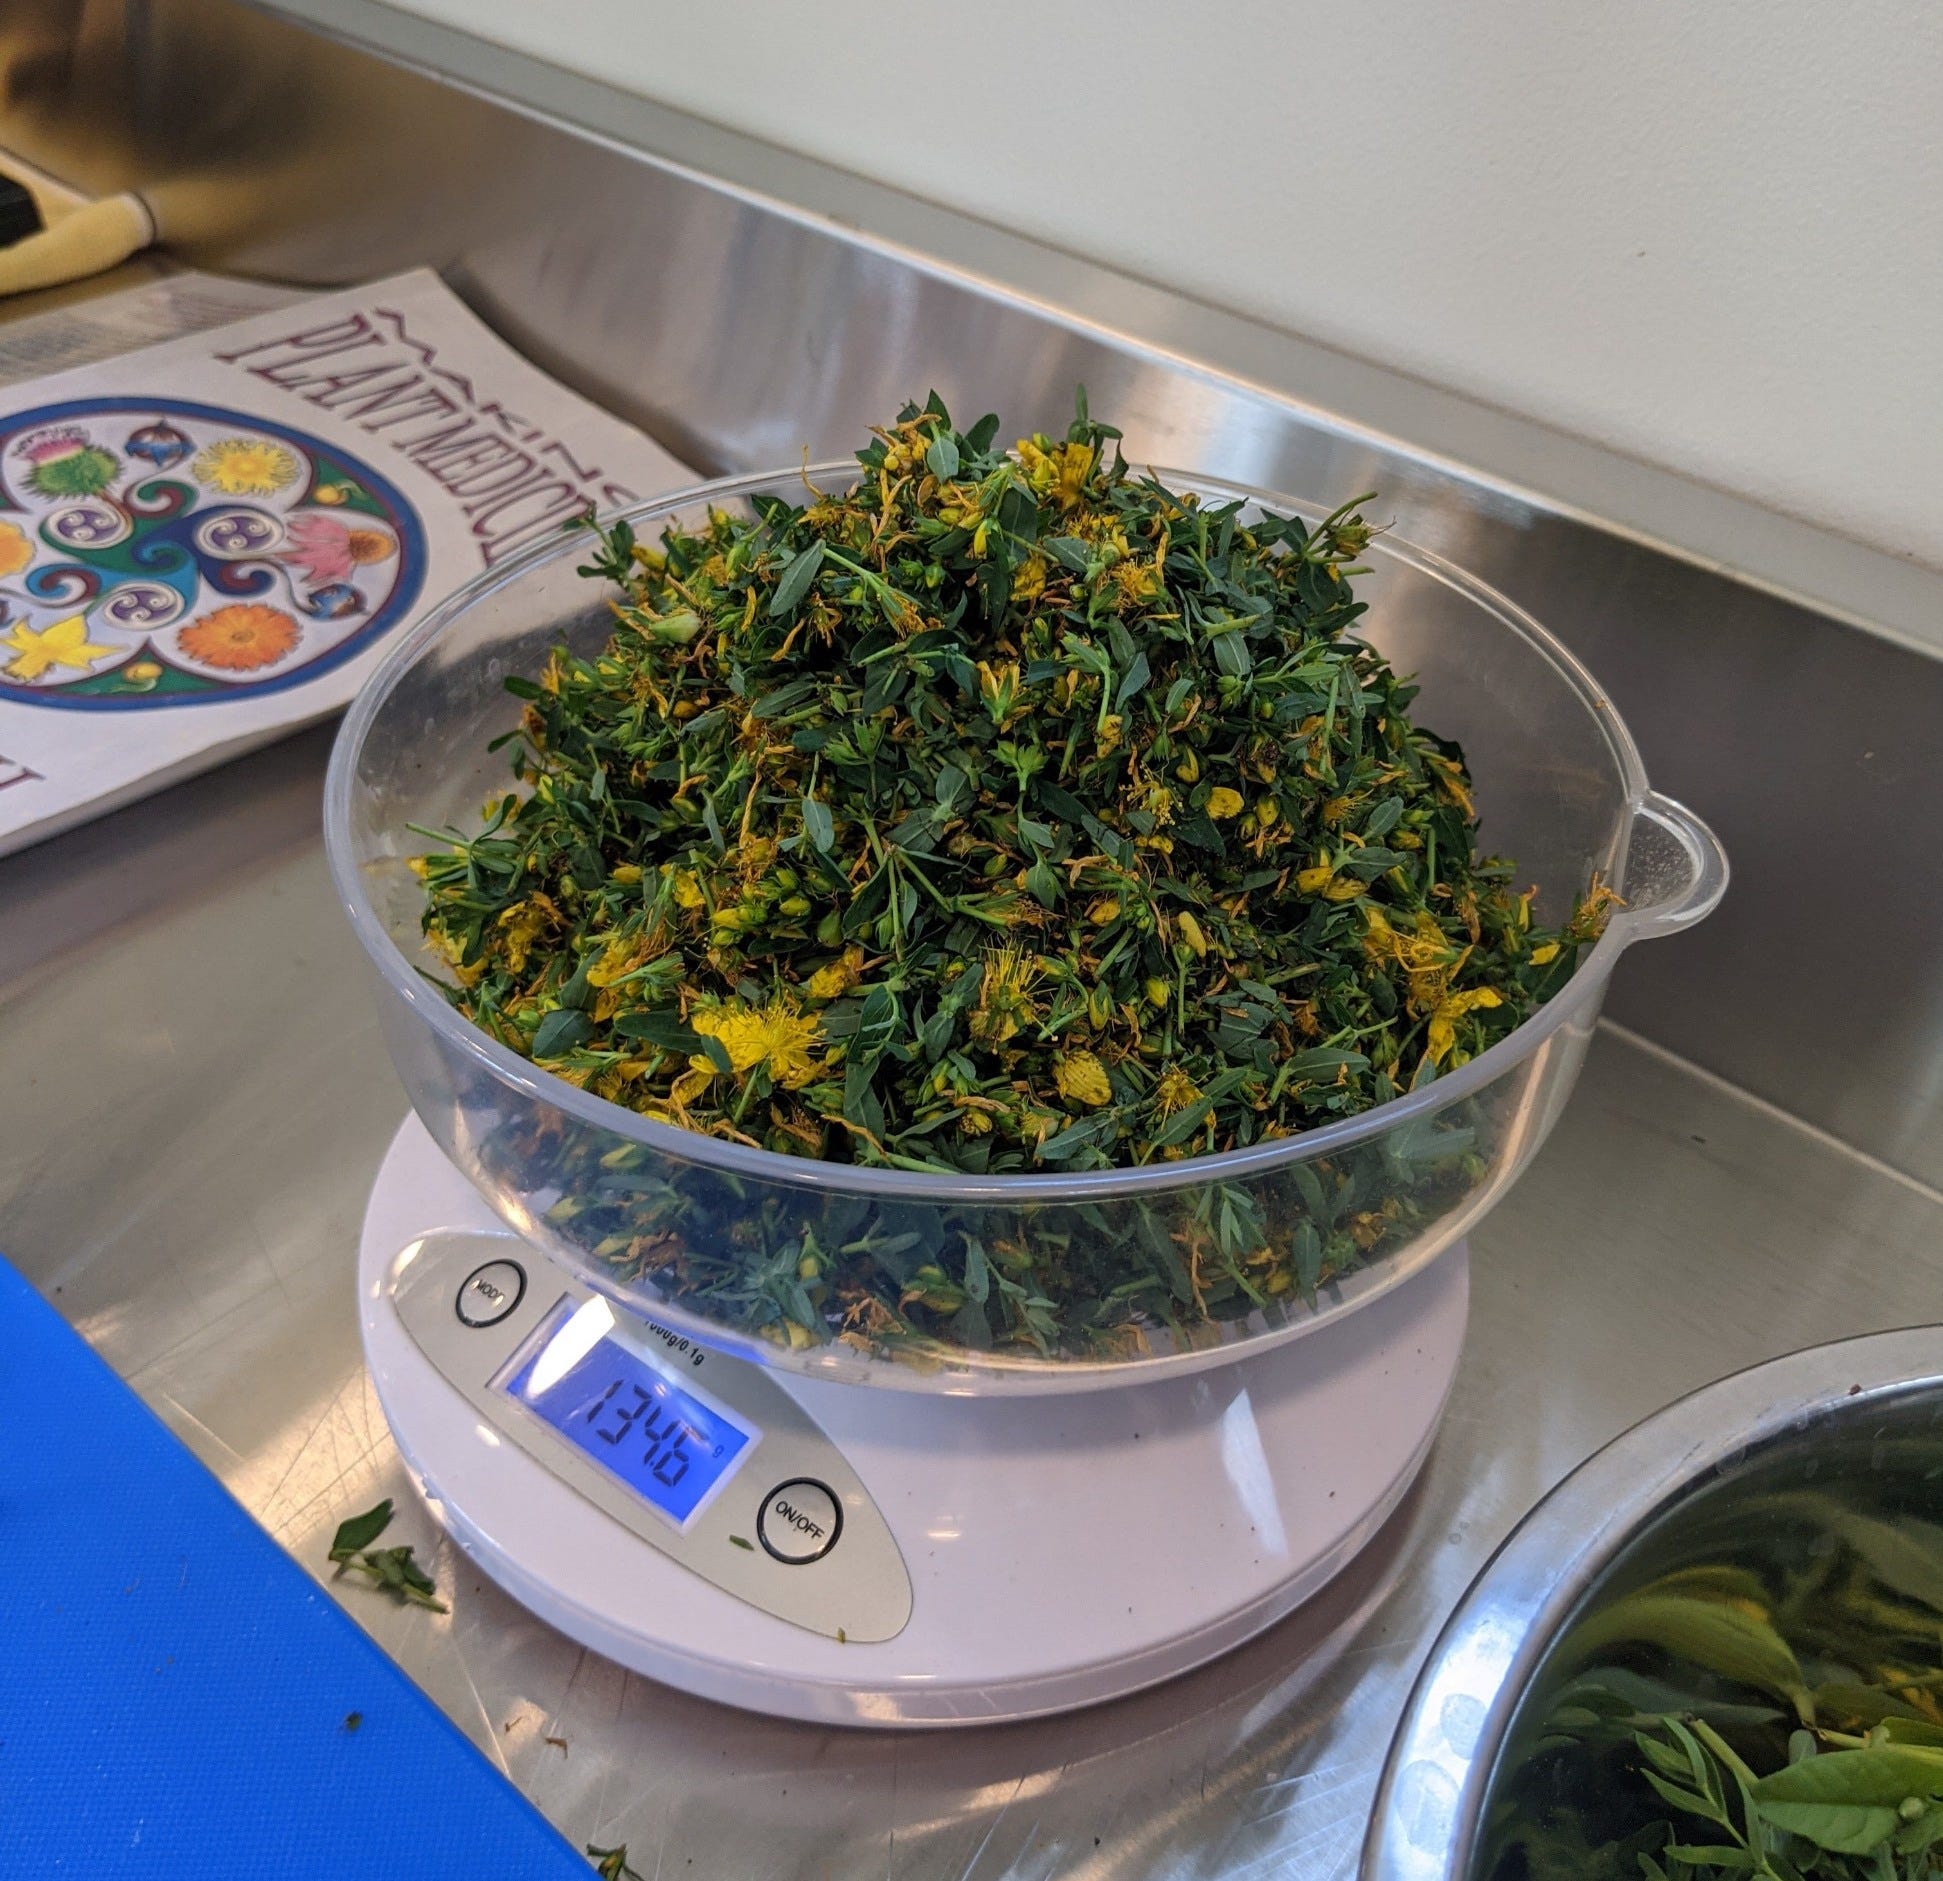
Saint John’s Wort (Hypericum perforatum)- I love using this plant in salves, and it gets to work quickly on nerve pain- whether caused by arthritis or trauma (or even annoying nerve spasms like restless leg syndrome-which I’ll often get when trying to fall asleep at night). A quick note: This plant can cause sun sensitivity when used topically so don’t go lizarding in the sun directly after application.
How to get it: The tricky thing about this plant is that it will only infuse in oil when fresh. Meaning, you’ll need to either grow it yourself or find someone local willing to supply it for you. This plant is typically harvested around the summer solstice, and many small herb farms require you to be on their email list before harvest season— so don’t wait until June to find a farmer friend!
Plants for sore muscles (to make topical relief salve)
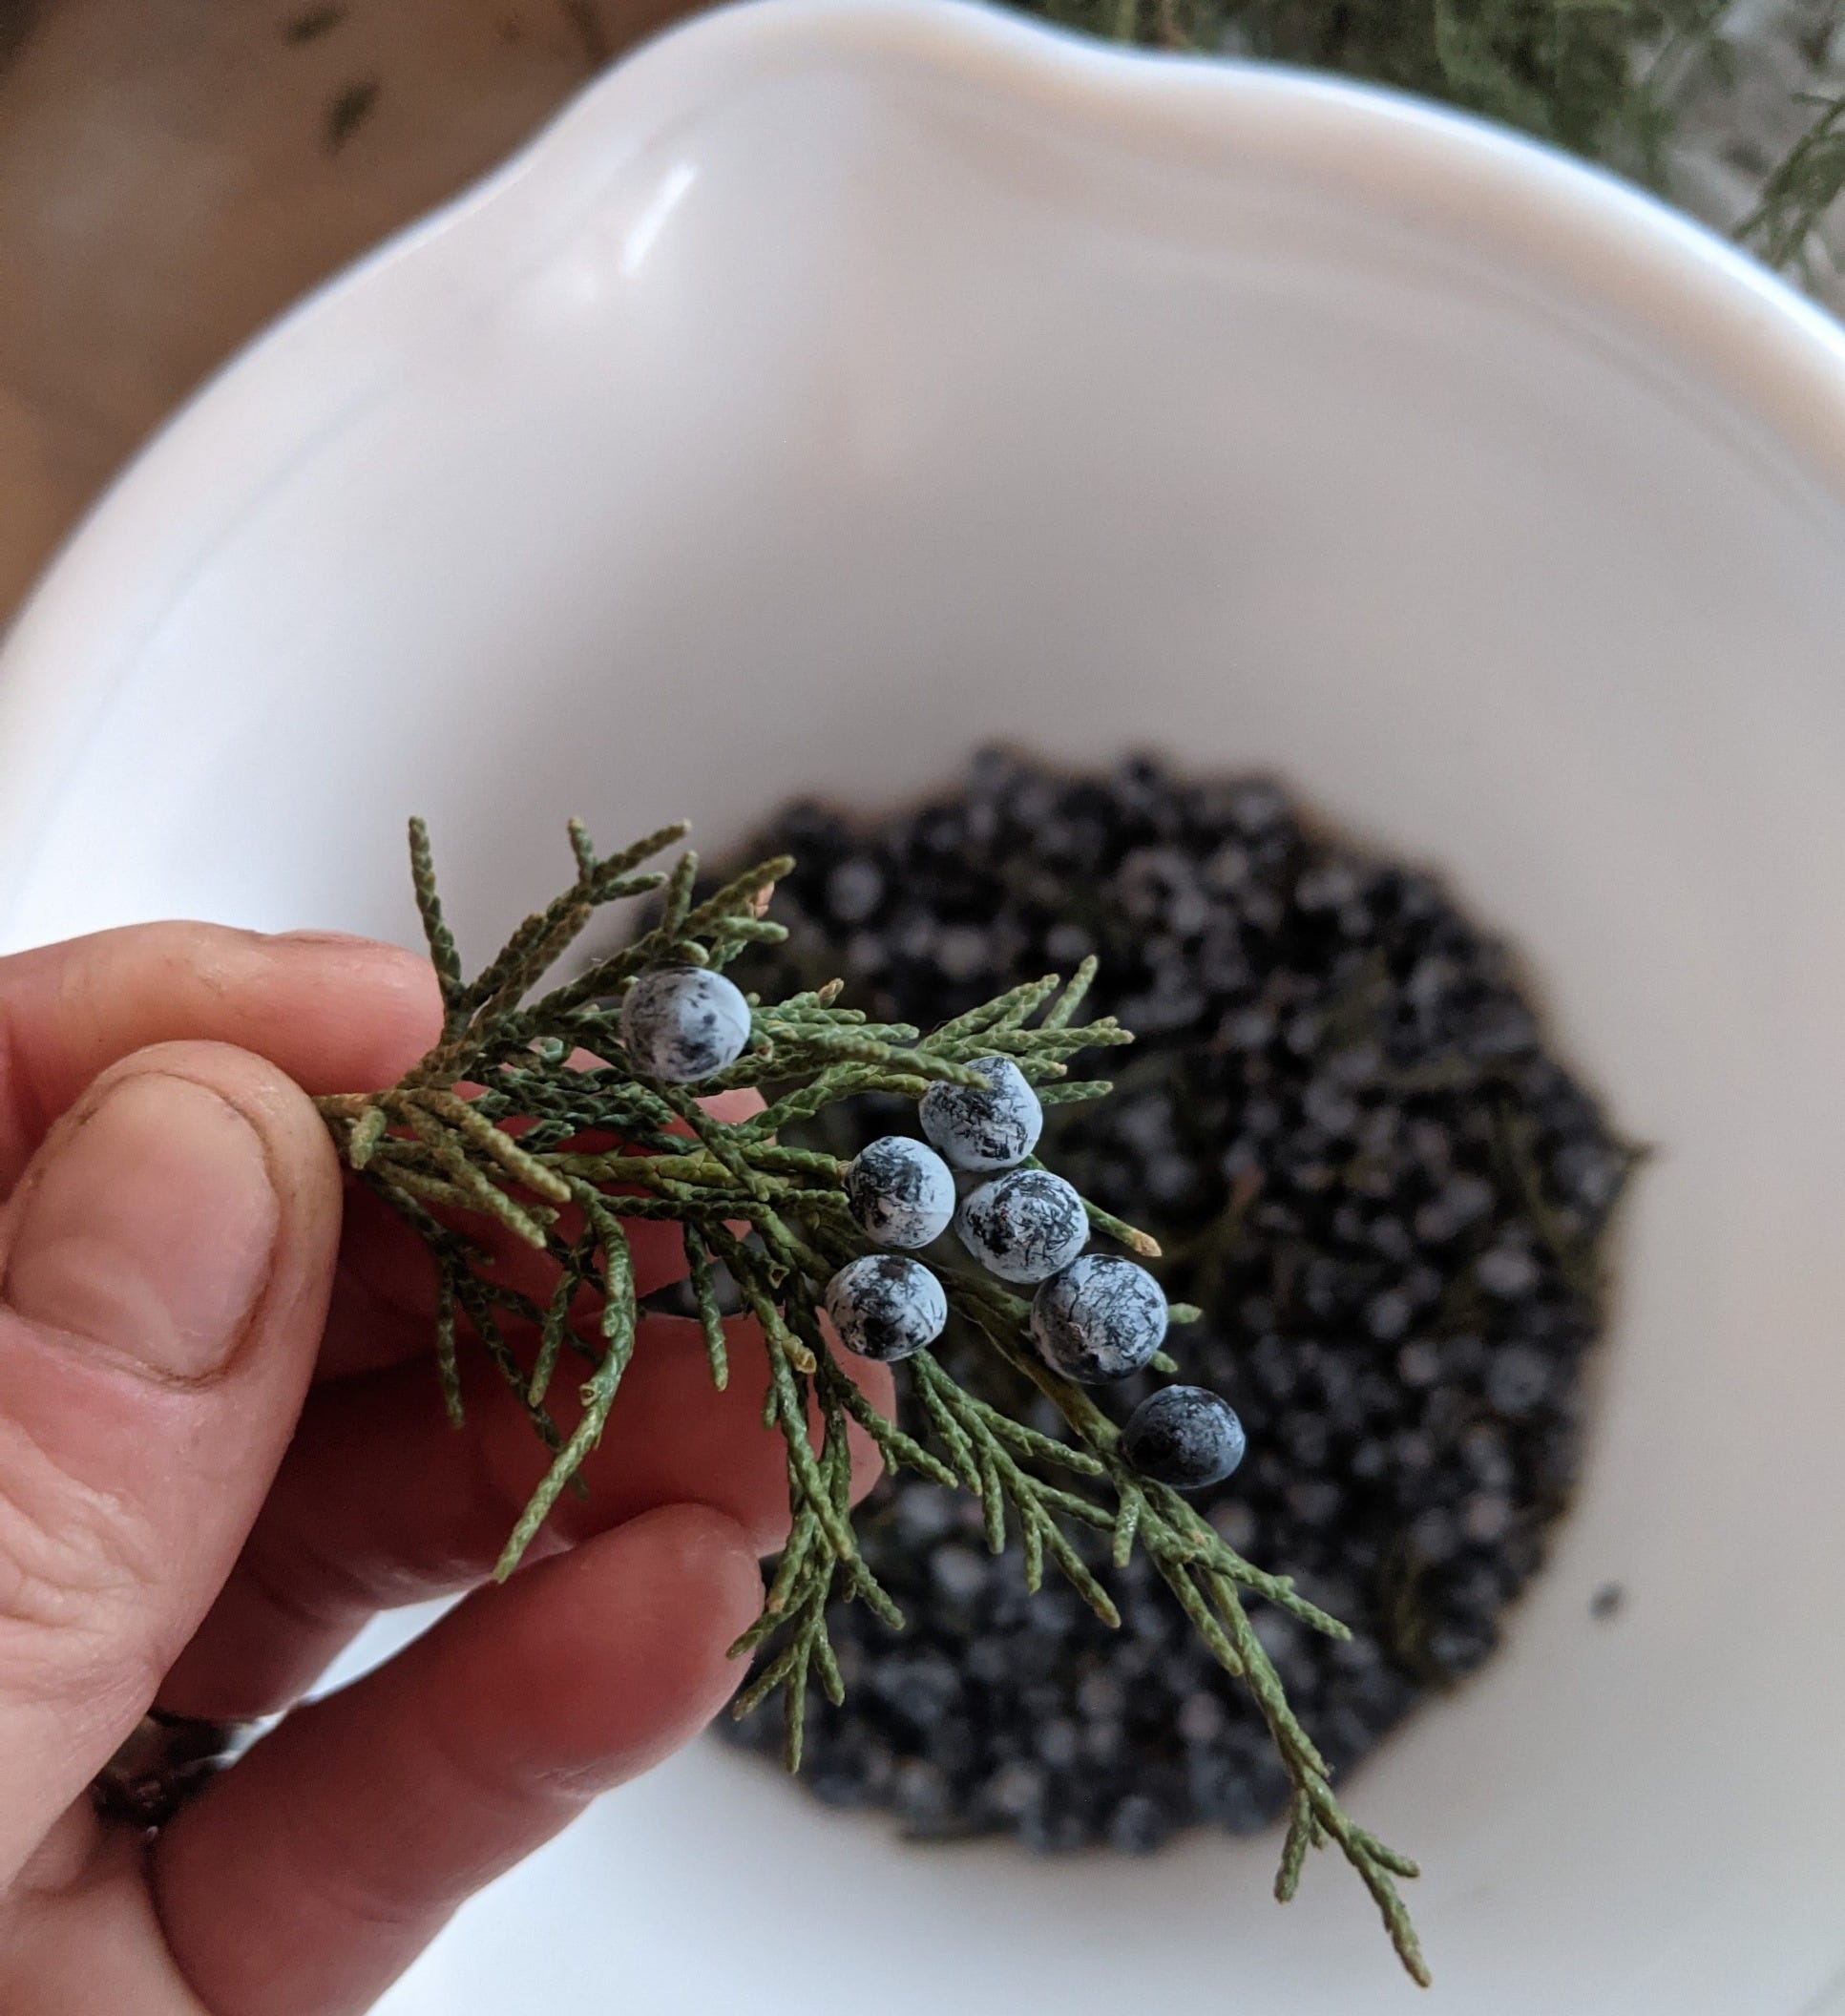
Juniper (Juniperus monosperma)- This oil is reportedly great for muscle pain. I haven’t personally used it yet because I only just strained off my first batch recently! What I love about this plant is that it can be readily found and harvested throughout the US. Just be sure you’re properly identifying the species of Juniper. Some non-native species (especially those used in landscaping) do not have the same medicinal properties and can even be mildly toxic.
How to get it: Pick up a local plant ID book, learn some foraging basics and then harvest the leaves and berries, letting them dry out for 24-48 hours before infusing in oil.Photo by CRYSTALWEED cannabis on Unsplash Cannabis leaves (Cannabis sativa)- If you grow your own, or know someone who does, be sure to save the leaves. These can be dried, optionally decarboxylated (ie. baked to release cannabinoids like THC) and infused to make your own CBD (and optionally THC) body oil. Spoiler alert: You’ll never pay the big price tag for CBD creams once you start making your own. This oil is amazing for muscle pain, spasms, and soreness, whether from trauma or overuse. I personally prefer the decarboxylated oil since the THC has healing/pain relieving properties as well that won’t be available without this step. And no, using decarboxylated leaves won’t get you high, but it might show up on a drug test—something to be aware of.

The other thing I love about making salves from body oils is that it makes your product last longer. After growing many of my own plants, drying them, and infusing them—one little jar of oil is often the result of hours of time and effort. By combining this oil with a beeswax (which is essentially all a salve is!), I’m able to stretch that product out farther. You can also choose what quantities of salves you want to make—buying anywhere from 2 oz to 4 oz tins.

How to make an herbal salve step by step
Now that I’ve completely derailed into plant lore, let’s get to salve making. Things you will need:
2x double boilers (one for oil and one for beeswax). This can be accomplished simply by having two pots and two heat-safe bowls (I like Pyrex) in which the bowls fit neatly into the pots. You will essentially be boiling water in the pot to heat your product in the bowl.
Beeswax pellets - buy locally whenever you can! If not, organic beeswax pellets can be purchased online. Pellets are the easiest form to work with and make the melting much faster.
Herbal oil of choice
Containers for pouring your salves
Essential oils (for smell—some herbal oils, especially canna oil doesn’t always smell very good)
Thermometer (I like the infrared thermometer guns because they can be used on food and don’t involve sticking anything into my product)
Oven mitts
Paper towels (for cleanup!)
TIME and patience : )
Step 1: Sanitize everything
Wash your hands, sanitize the surfaces of your workspace, wash your bowls and pots, wash and dry your salve containers, and sanitize everything as well. For basic sanitization (after soap & water and air-drying) I like to use a spray bottle and create a 70% alcohol mixture (dilute 90 proof grain alcohol with water—eyeball it people, anything above 60% is going to kill whatever your soap didn’t). Lay out your sanitized salve tins on paper towels-this will help with cleanup later.
Step 2: Measure your ingredients
Start by deciding how much salve you want to make, then work backwards. For example, the last time I made salve I wanted to fill 2x 8oz tins, and 4x 4oz tins. Added up, this means 32oz of finished product. So that’s where you start. Trigger warning: Math to follow.
Note: This basic herbal salve recipe is based on the information shared in Richo Cech’s amazing book Making Plant Medicine (which I HIGHLY recommend), with slight modifications based on my own experience.
I use a 6:1 ratio (which does in fact seem to make the best salve consistency). This ratio breaks down to milliliters of oil to grams of beeswax. Read that twice- yes we’re using two different measurements. But don’t panic. If someone who nearly flunked basic math in all forms of general testing throughout her life is doing this, SO CAN YOU.
Since we’re dealing in mls, the first step is to convert your 32oz, which comes to 946mls. This represents the entire amount of your desired finished product, now converted. But we need to know how much of that is oil vs. beeswax.
This is where the math starts. 946 divided by 7= 135mls. We’ve now broken this number out into 7 equal units, which we can use to get back to that 6:1 ratio.
For the oil (the 6 in 6:1):
135 x 6 = 810 —which means you will need 810mls of oil
For the beeswax (the 1 in 6:1):
135mls converts to roughly 4.5oz or 128 grams of beeswax
It’s always a good idea to check your math backwards. Ie. confirm that 810 is indeed the result of 946-135 (it is). Better to get these details right before potentially wasting any product.
Now that we survived the math, you can use your scale to measure out the grams of wax and a measuring cup to ration out your mls of oil.
Step 3: Get cookin’
Pour your oil in one prepared double boiler and your wax in another. Per Richo, you will want to bring your oil to a temperature of 150 degrees Fahrenheit. Since the oil will likely heat faster than your wax will melt (and the ideal is to have both ready at roughly the same time), I like to use a slightly higher temperature on the wax double boiler and a lower one for the oil. Have your thermometer ready to monitor the temp of your oil and turn off the burner once it’s reached 150 degrees.
Step 4: Pour your salves
Once the wax is melted and your oil is at the right temperature, don your oven mitts and combine the two either using one of the double-boiler bowls or a separate sanitized one. Remember: wax is incredibly temperature sensitive and if you pour it by itself into a cold bowl, it will solidify around the edges. This is why I like to either use a larger bowl for the oil that will also fit my wax or a clean, heat-safe bowl with a spout (which makes pouring easier) to combine.
With wax and oil combined, you’ll need to act quickly to pour your salves into their final containers before the wax cools. But here’s the thing: You can always reheat things again if they solidify too quickly, so don’t stress it out.
Now’s also the time to add in a few drops of essential oils (I like lavender) or Vitamin E oils. If you aren’t familiar with essential oils, I’d recommend learning about them before adding them to anything. Many essential oils aren’t meant to be used topically as they can cause sun sensitivity and other reactions (lavender is one of the few exceptions). When in doubt, leave it out.
Step 5: Keep notes
If you’ve made it this far, well done grasshopper. You’ll likely have some pretty awesome salve to use on yourself and share with family and friends. Be sure to take some notes on your ratios, math, and the products you used (ie. where you bought the beeswax and oil, tins etc.) This will be useful the next time you go to make salve, but it will also help you perfect your craft.

Welcome to Rooted In. I’m a writer and herbalist who created this publication as an act of anarchy, because I believe that everyone should know basic herbal remedies to care for themselves and their families (pets too). Know someone else who’d benefit from this post? Be sure to tell them about it.